

Window Installation
My ProMaster came with windows in the back doors, but otherwise had no natural light entering the van. I was concerned about feeling too confined (it's only 60 square feet after all), so I wanted to do what I could to make it feel more open. Adding windows seemed like a natural way to open up the living quarters, but I was severely intimidated by the idea of cutting holes out of the side of my van.
I found instructions from a few people (primarily this) on installing windows, but the greatest help was talking to Paul (Instagram), another former Epic employee who is chasing van life, but just a few months ahead of me. He was an incredible resource in sharing this article on installing windows and in talking me through the process (and many other helpful tips throughout my conversion). He gave me the confidence I needed to pursue adding windows. I can't stress enough how helpful it is to talk to other people and ask the questions that you're not sure about.

So I needed to decide where I wanted to add windows. It didn't seem to make sense to add one to the sliding door since that can open and thus expand my "living quarters" to my surroundings. And adding one above the kitchen area didn't seem worth it since my time there would be limited relative to the bed. So I decided to add one window on the driver side, which wouldn't be impeded by an open sliding door. But then I thought it would be nice to have the entire bed region (the main place I'd be spending time "indoors") feel more open by adding windows on both sides, for when I didn't want to have the sliding door open. So I ended up getting two windows from CR Laurence. I had to make sure they would work for my van, so if you're doing this make sure you're picking out the right window.
Supplies Used
- 2 CR Laurence windows
- 1/4" plywood
- Lots and lots of clamps
- Butyl tape (30' roll - didn't use all of it)
- Plastic scraper
- Angle grinder
- Drill
- Jigsaw
- Metal cutting blades
- Painters tape
- Impact driver
- Caulk gun and construction adhesive
- Metal file and rust paint
- Second human (decently important)
- Hose and water for testing leakage
- 3M marine sealant
Window Construction and Spacer
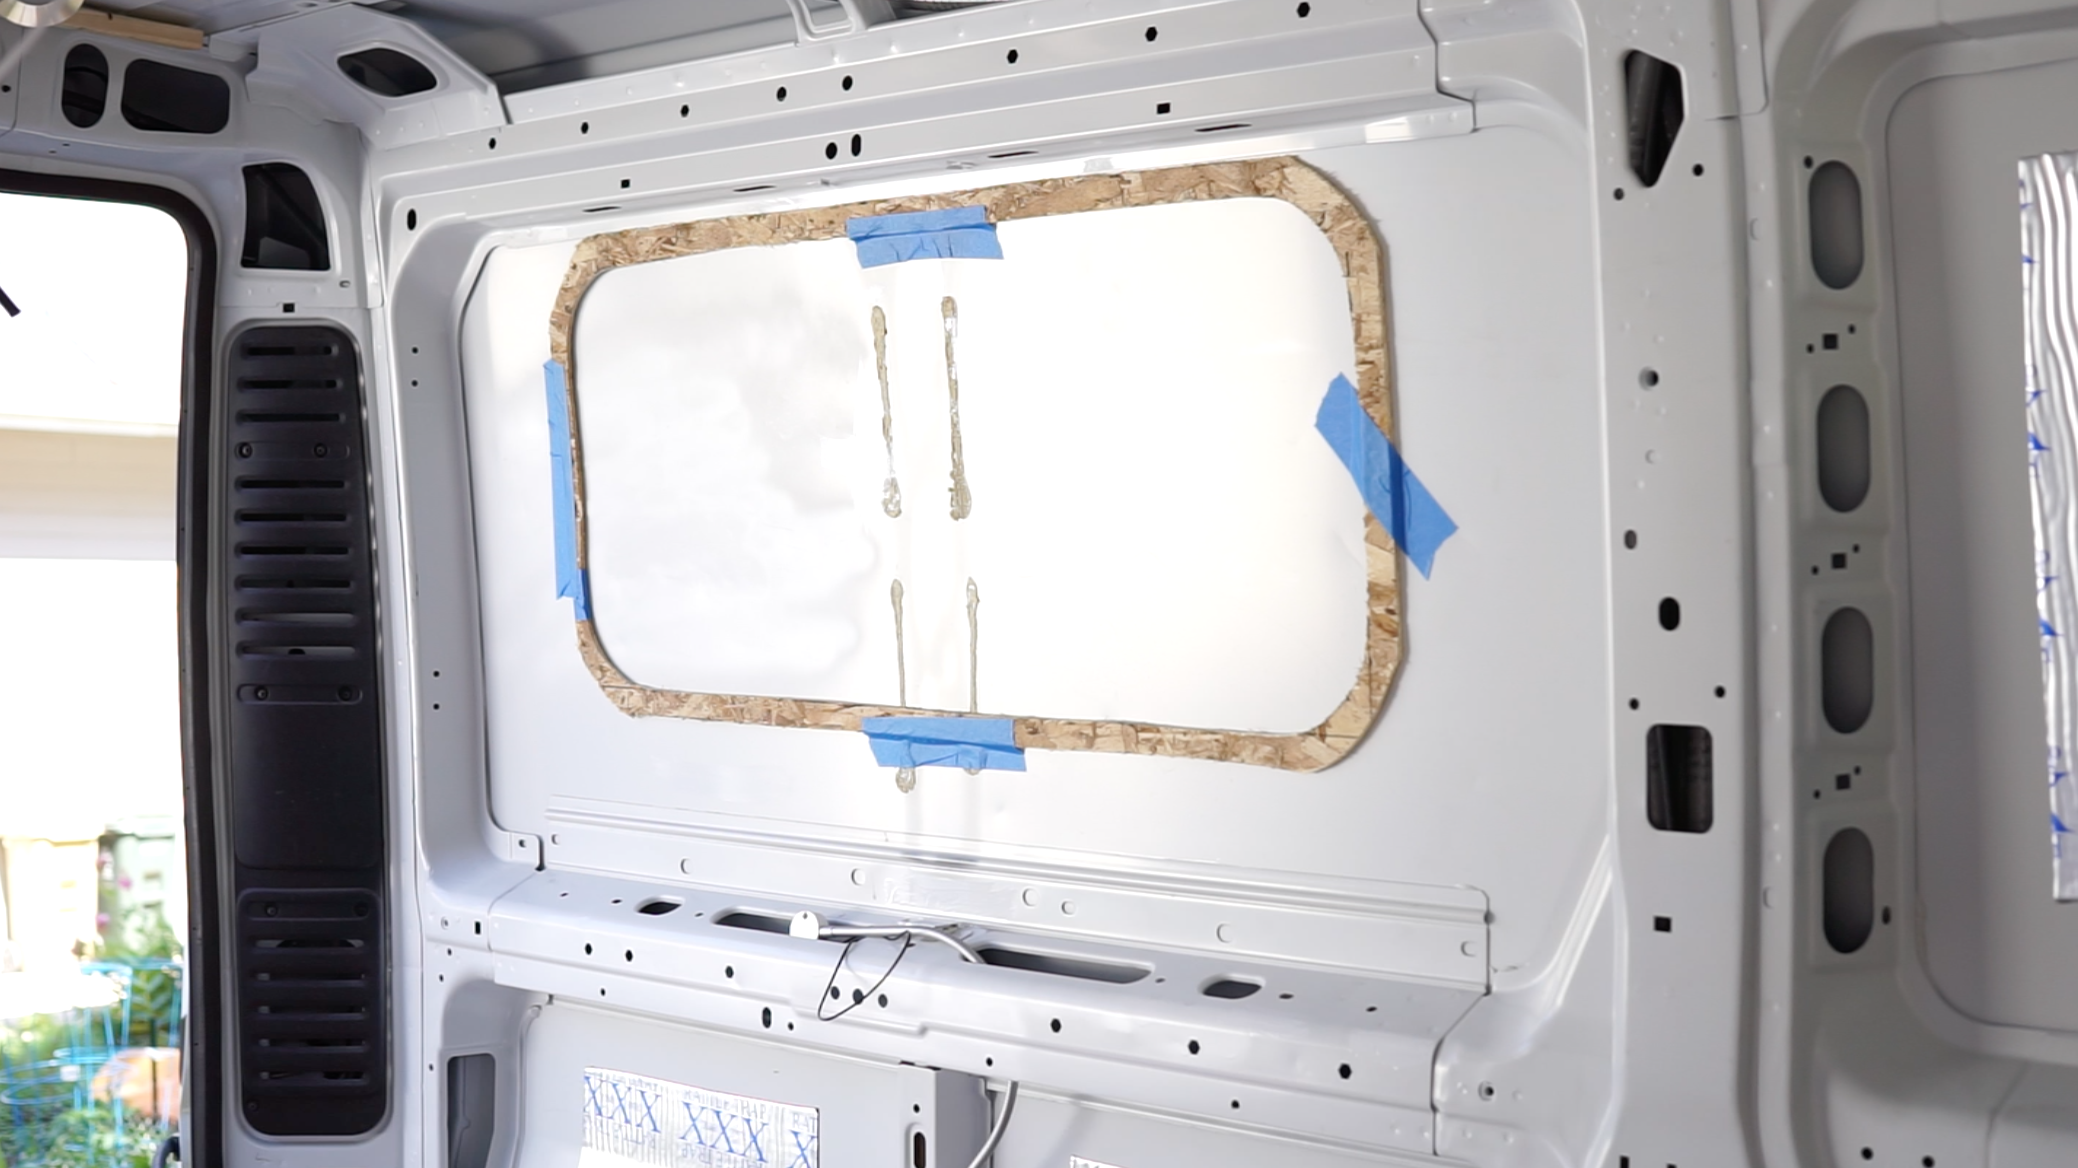
The windows I bought came with the exterior piece that would be placed into my cut hole from the outside and with a clamp ring to put on the inside of the van. These two pieces needed a spacer between them, to be placed on the inside of the van against the metal wall. I was able to make this spacer using 1/4" plywood as recommended by others. The clamp ring came screwed onto the exterior piece in a way that created a wide space (2.5" I believe) between them. The clamp ring needs to be removed for the installation, but it also needs to be flipped around onto it's back so the space between the exterior and clamp pieces is about 1/4". For some reason this took me a while to grasp and Paul was essential in opening my eyes to something so simple.
Taking apart the window and clamp ring, I traced the interior of the clamp ring onto cardboard and cut that out. Then I made sure that fit (or so I thought) around the window before tracing it onto my first piece of plywood and cutting out that shape. Then I made sure the exterior piece of the window would fit through the cut out hole in my plywood. After making minor adjustments and ensuring a proper fit, I traced a 1" perimeter around the hole for the width of the spacer and then cut that piece out. The width doesn't need to be larger than 1" (it probably doesn't need to be that big even), but it doesn't really matter all that much if you go larger. So with my spacer that fit around the exterior window and between the clamp ring, I was ready to begin preparation on the van.
Van Preparation
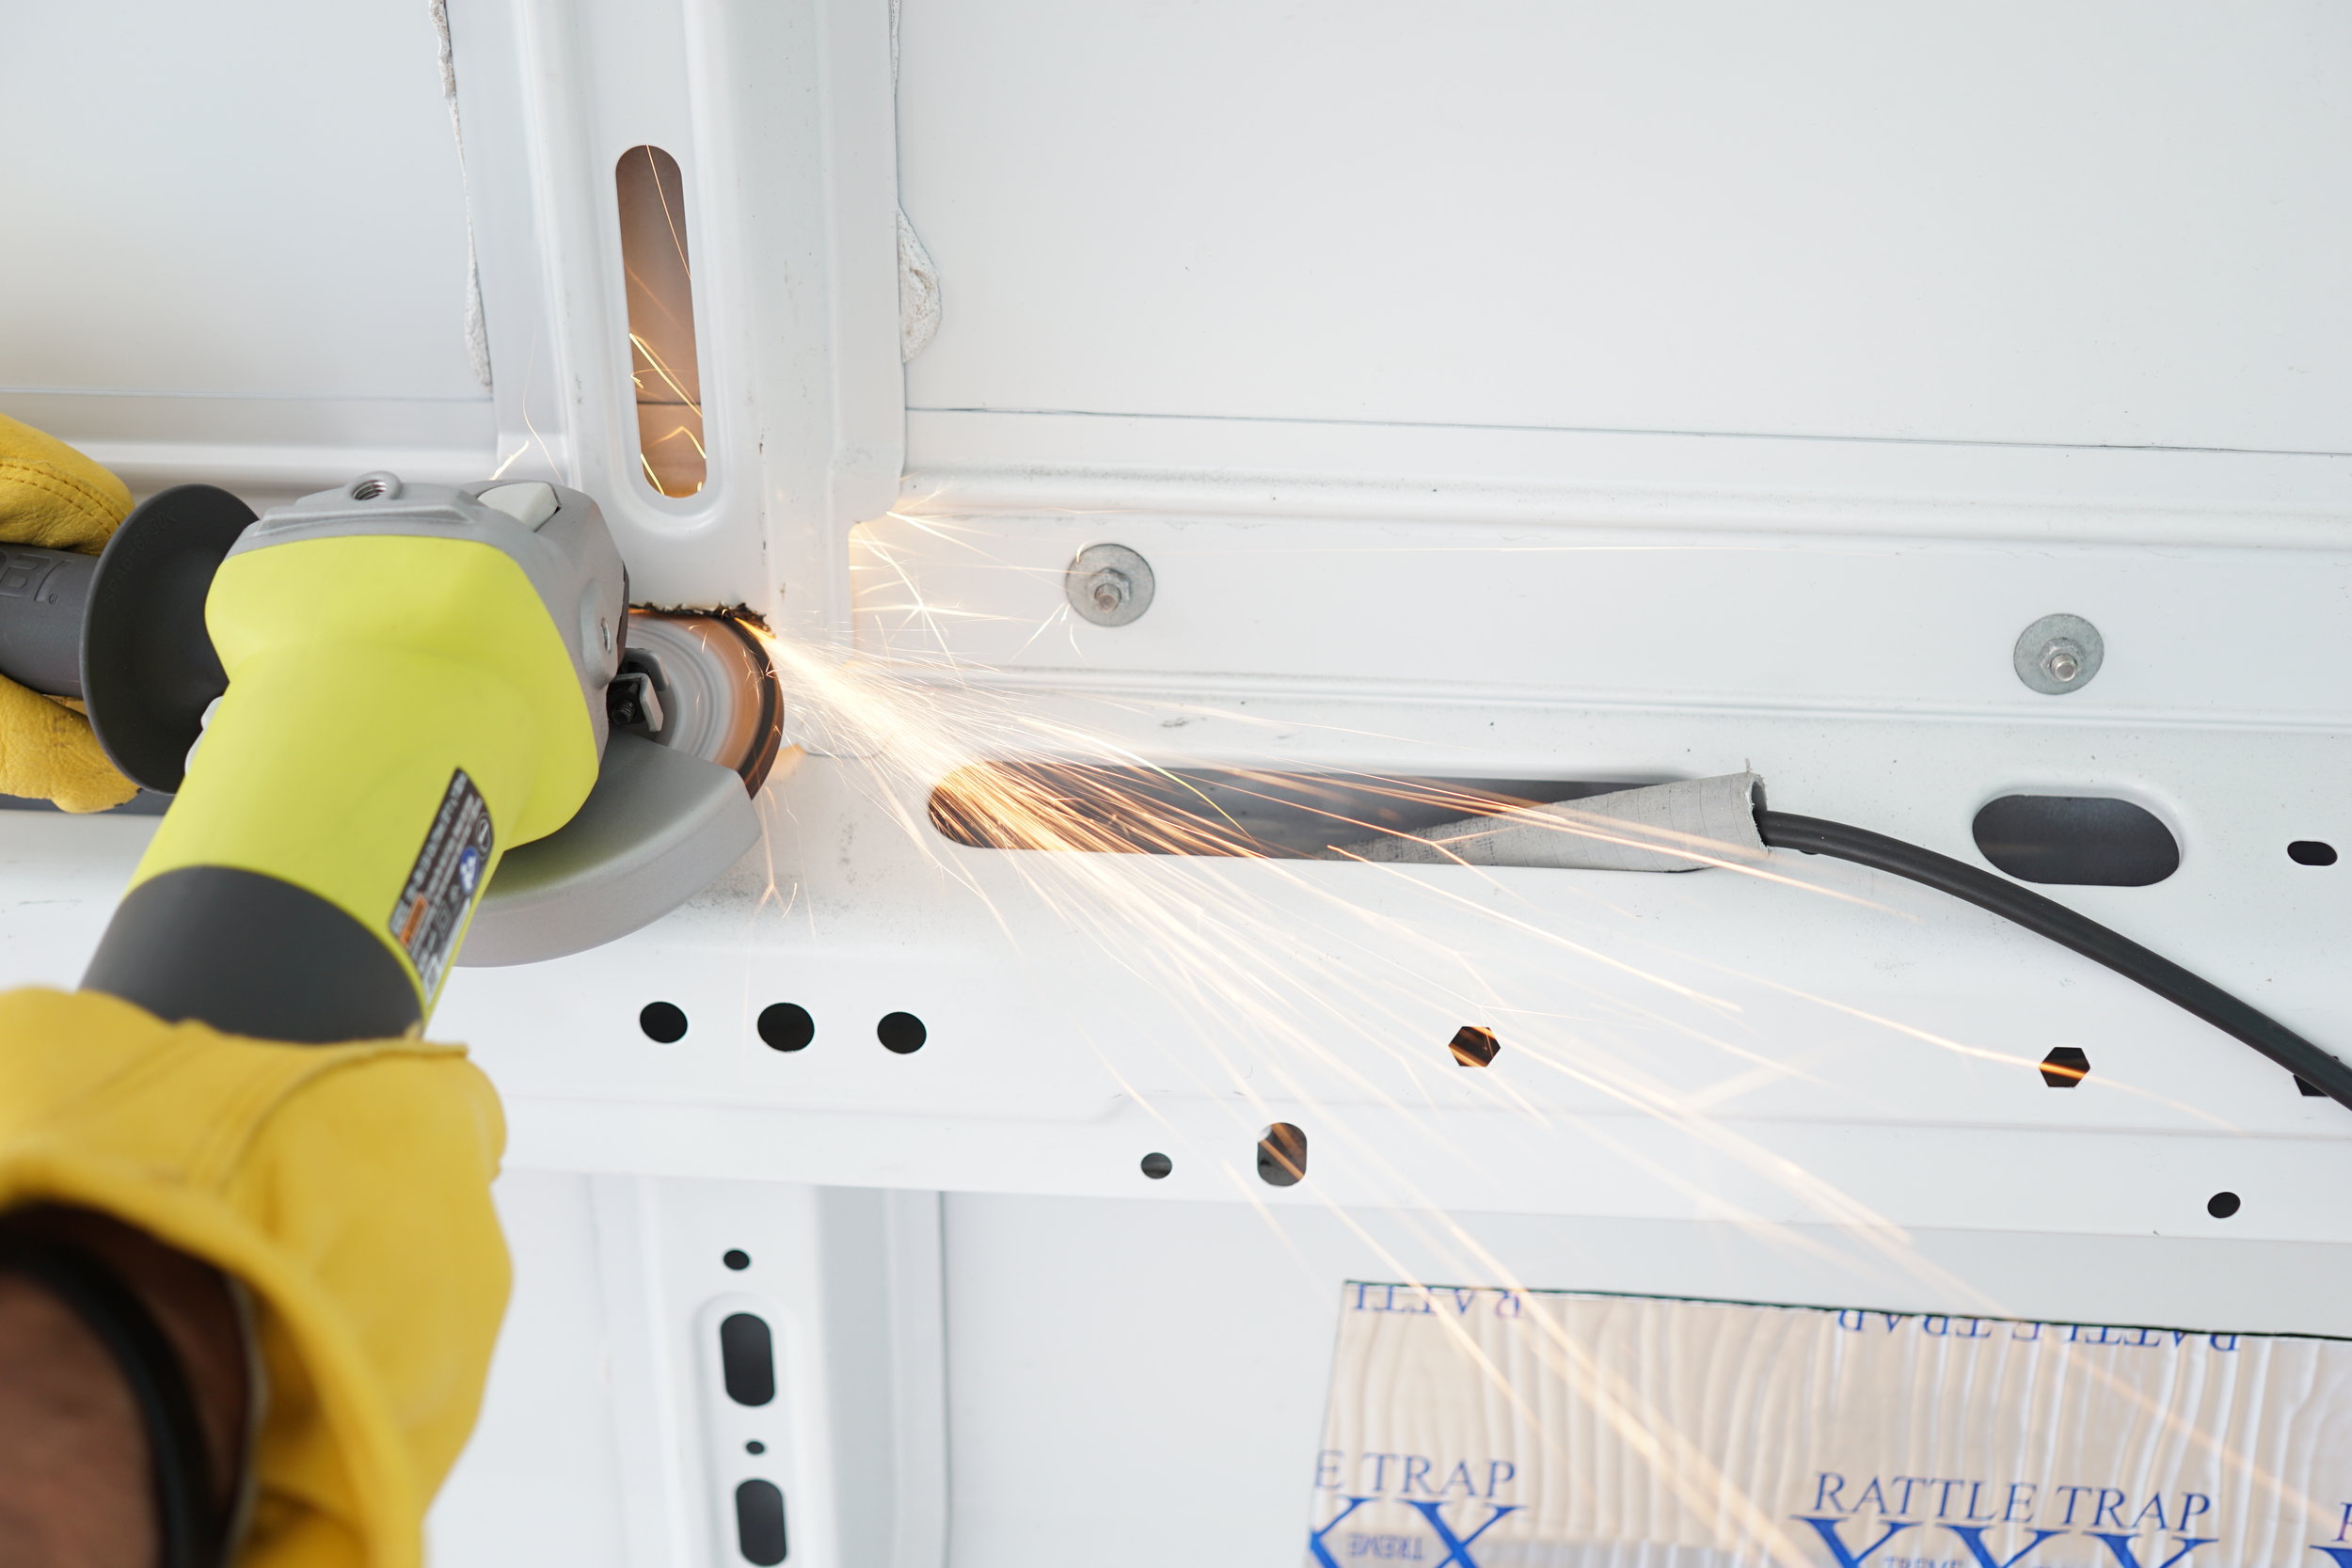
The overall objective in preparation was to cut out the holes for the windows. In order to do that, I had to first remove the ribbing "supports" on the side panels of the van. Theses don't really provide true structural support as far as I've read and they've been removed by others. They seem to just help dampen vibrations. But you should still make your own decisions about whether or not to do this for the sake of installing windows.
I used an angle grinder to go through the metal of these supports (at least at the bottom), which made decently quick work of something that otherwise could have been a pain. I then had to work it off the wall from whatever foam glue substance they used to attach that part. However, I'm not 100% positive it's necessary to use the angle grinder. It worked through the meaty part of the support on the bottom, but the top was more complicated. On the first support I used the angle grinder, which left a small top piece. I had to pry off the top piece by working it back and forth to break it from the welding (you can see a bottom piece in the third picture that's representative of what I'm talking about). It left a small piece of welded metal, but I was able to file that down a little bit. On the second support I removed the top with a hacksaw blade, which was more cumbersome to a degree, but also cleaner. So you might be able to disconnect the support at the bottom, pry it from the foam glue substance, and then essentially pry it off by working it back and forth on the top welding... but I'm not sure about that.
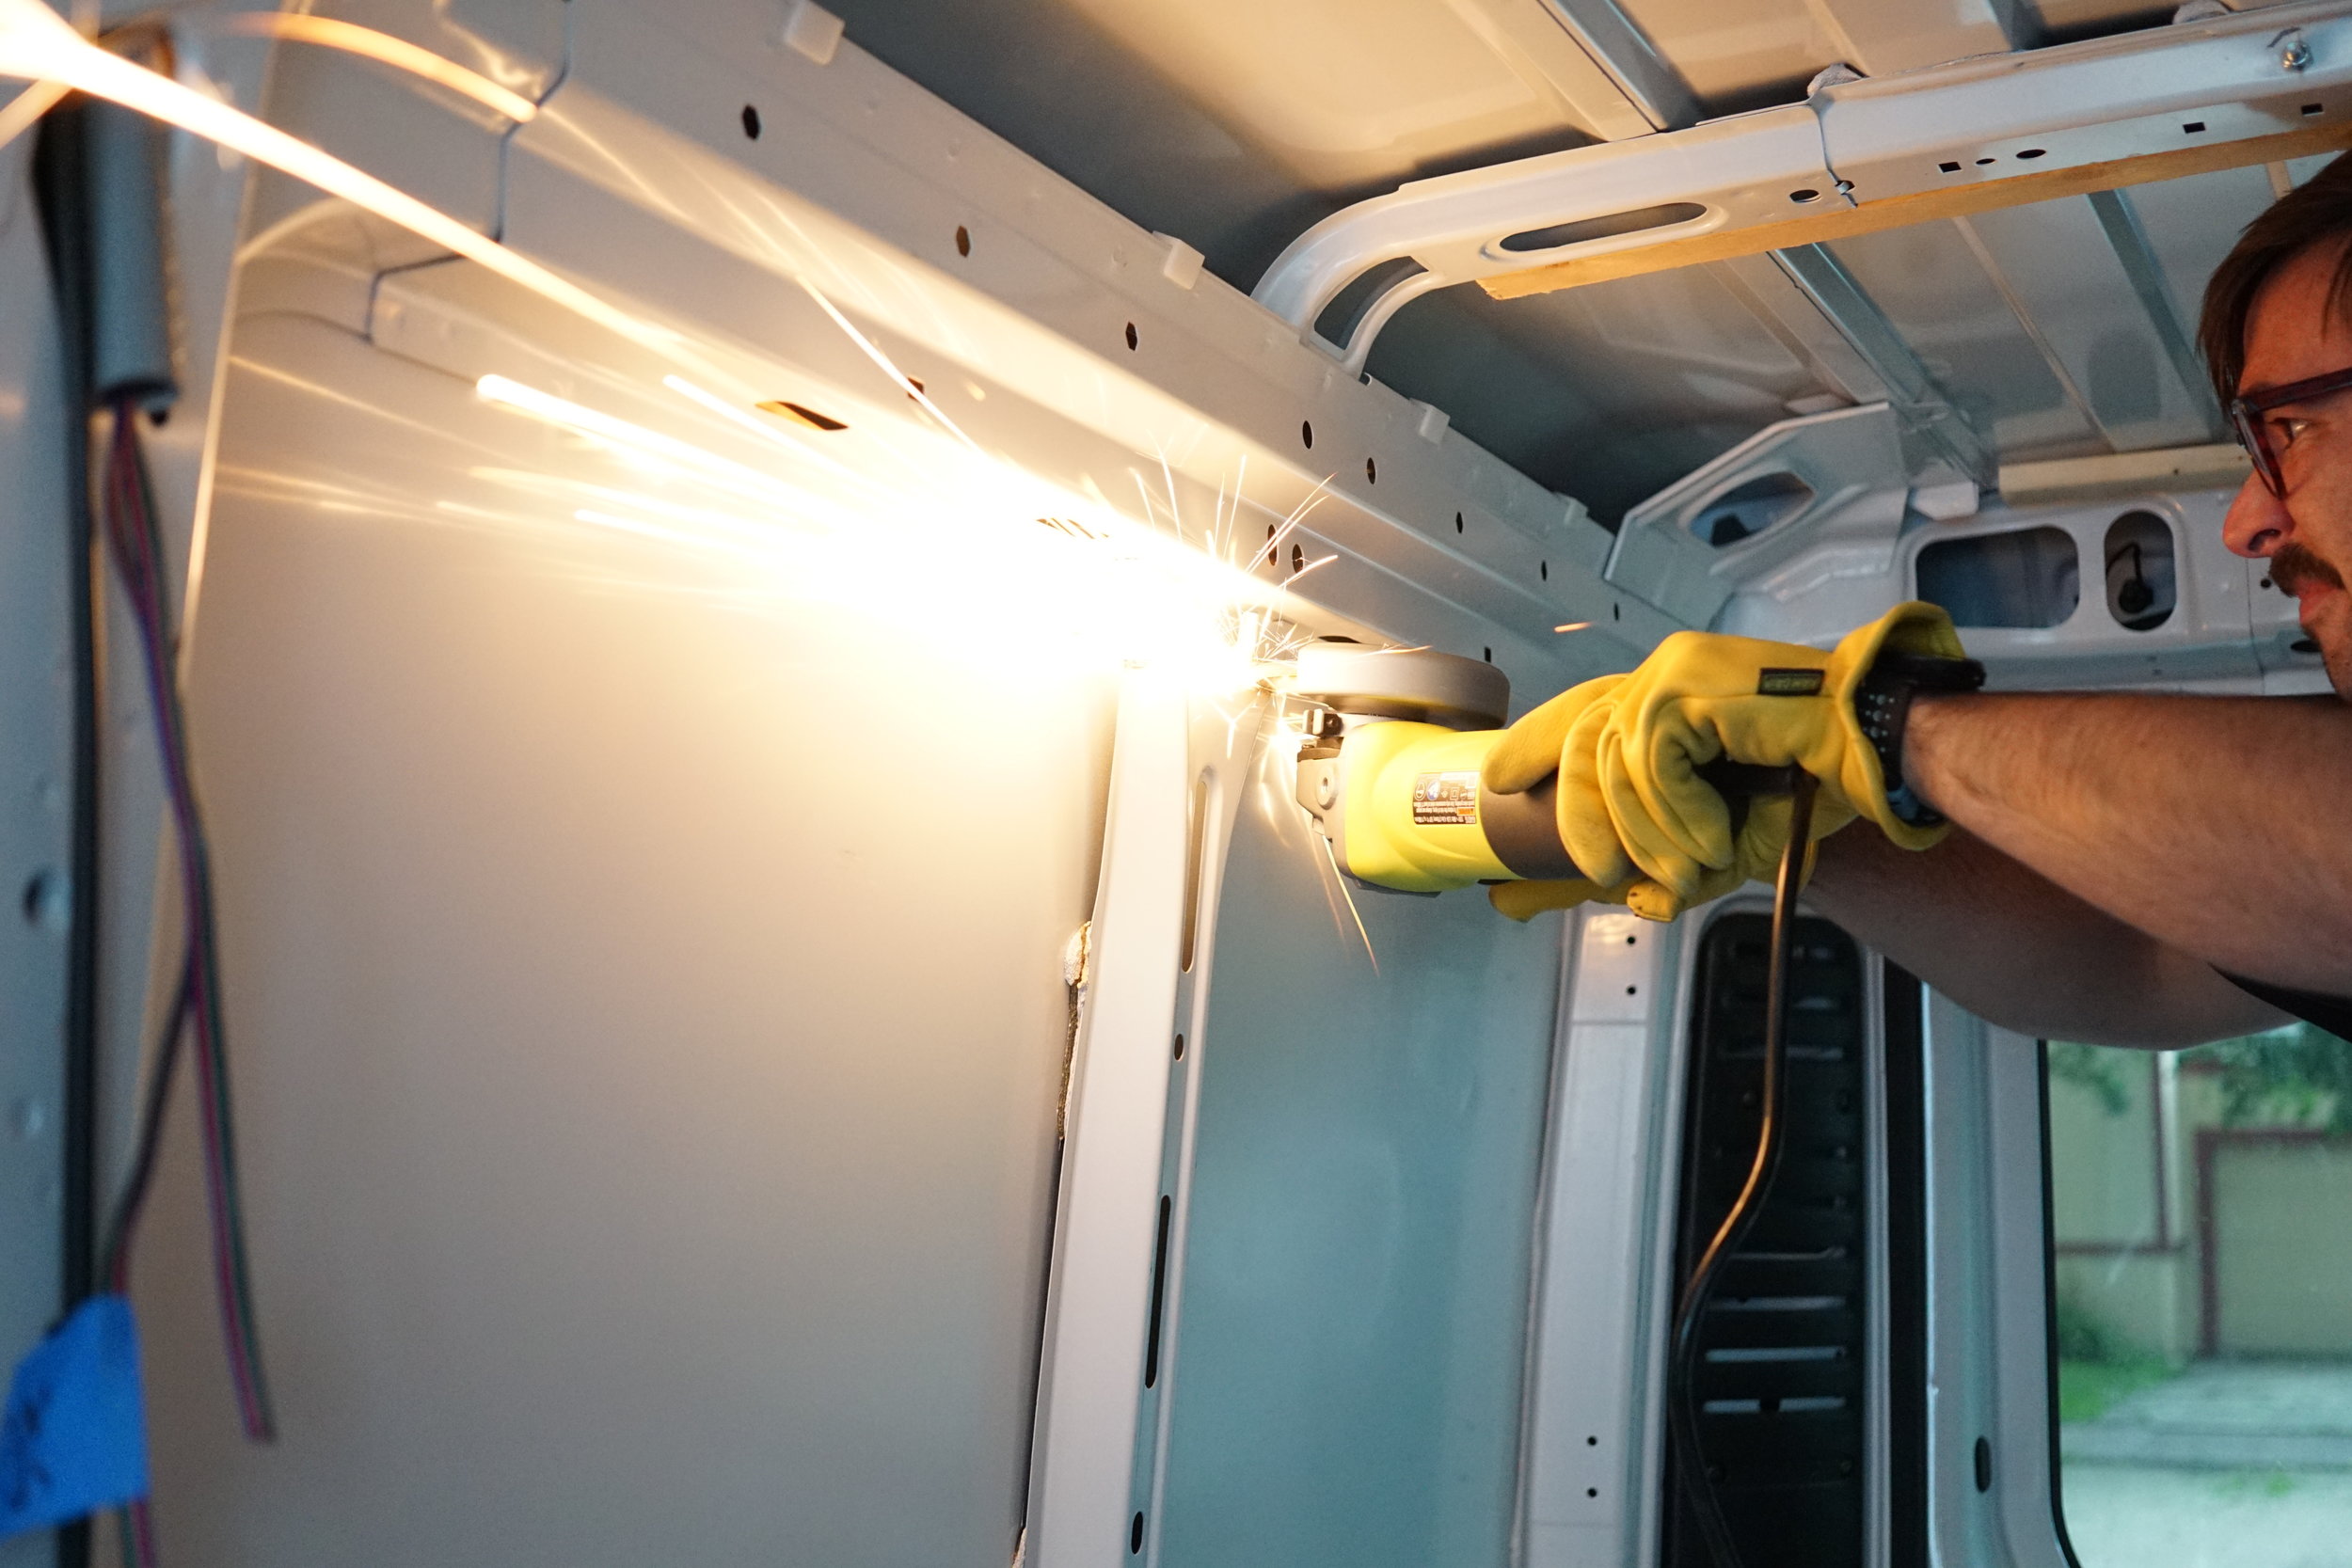

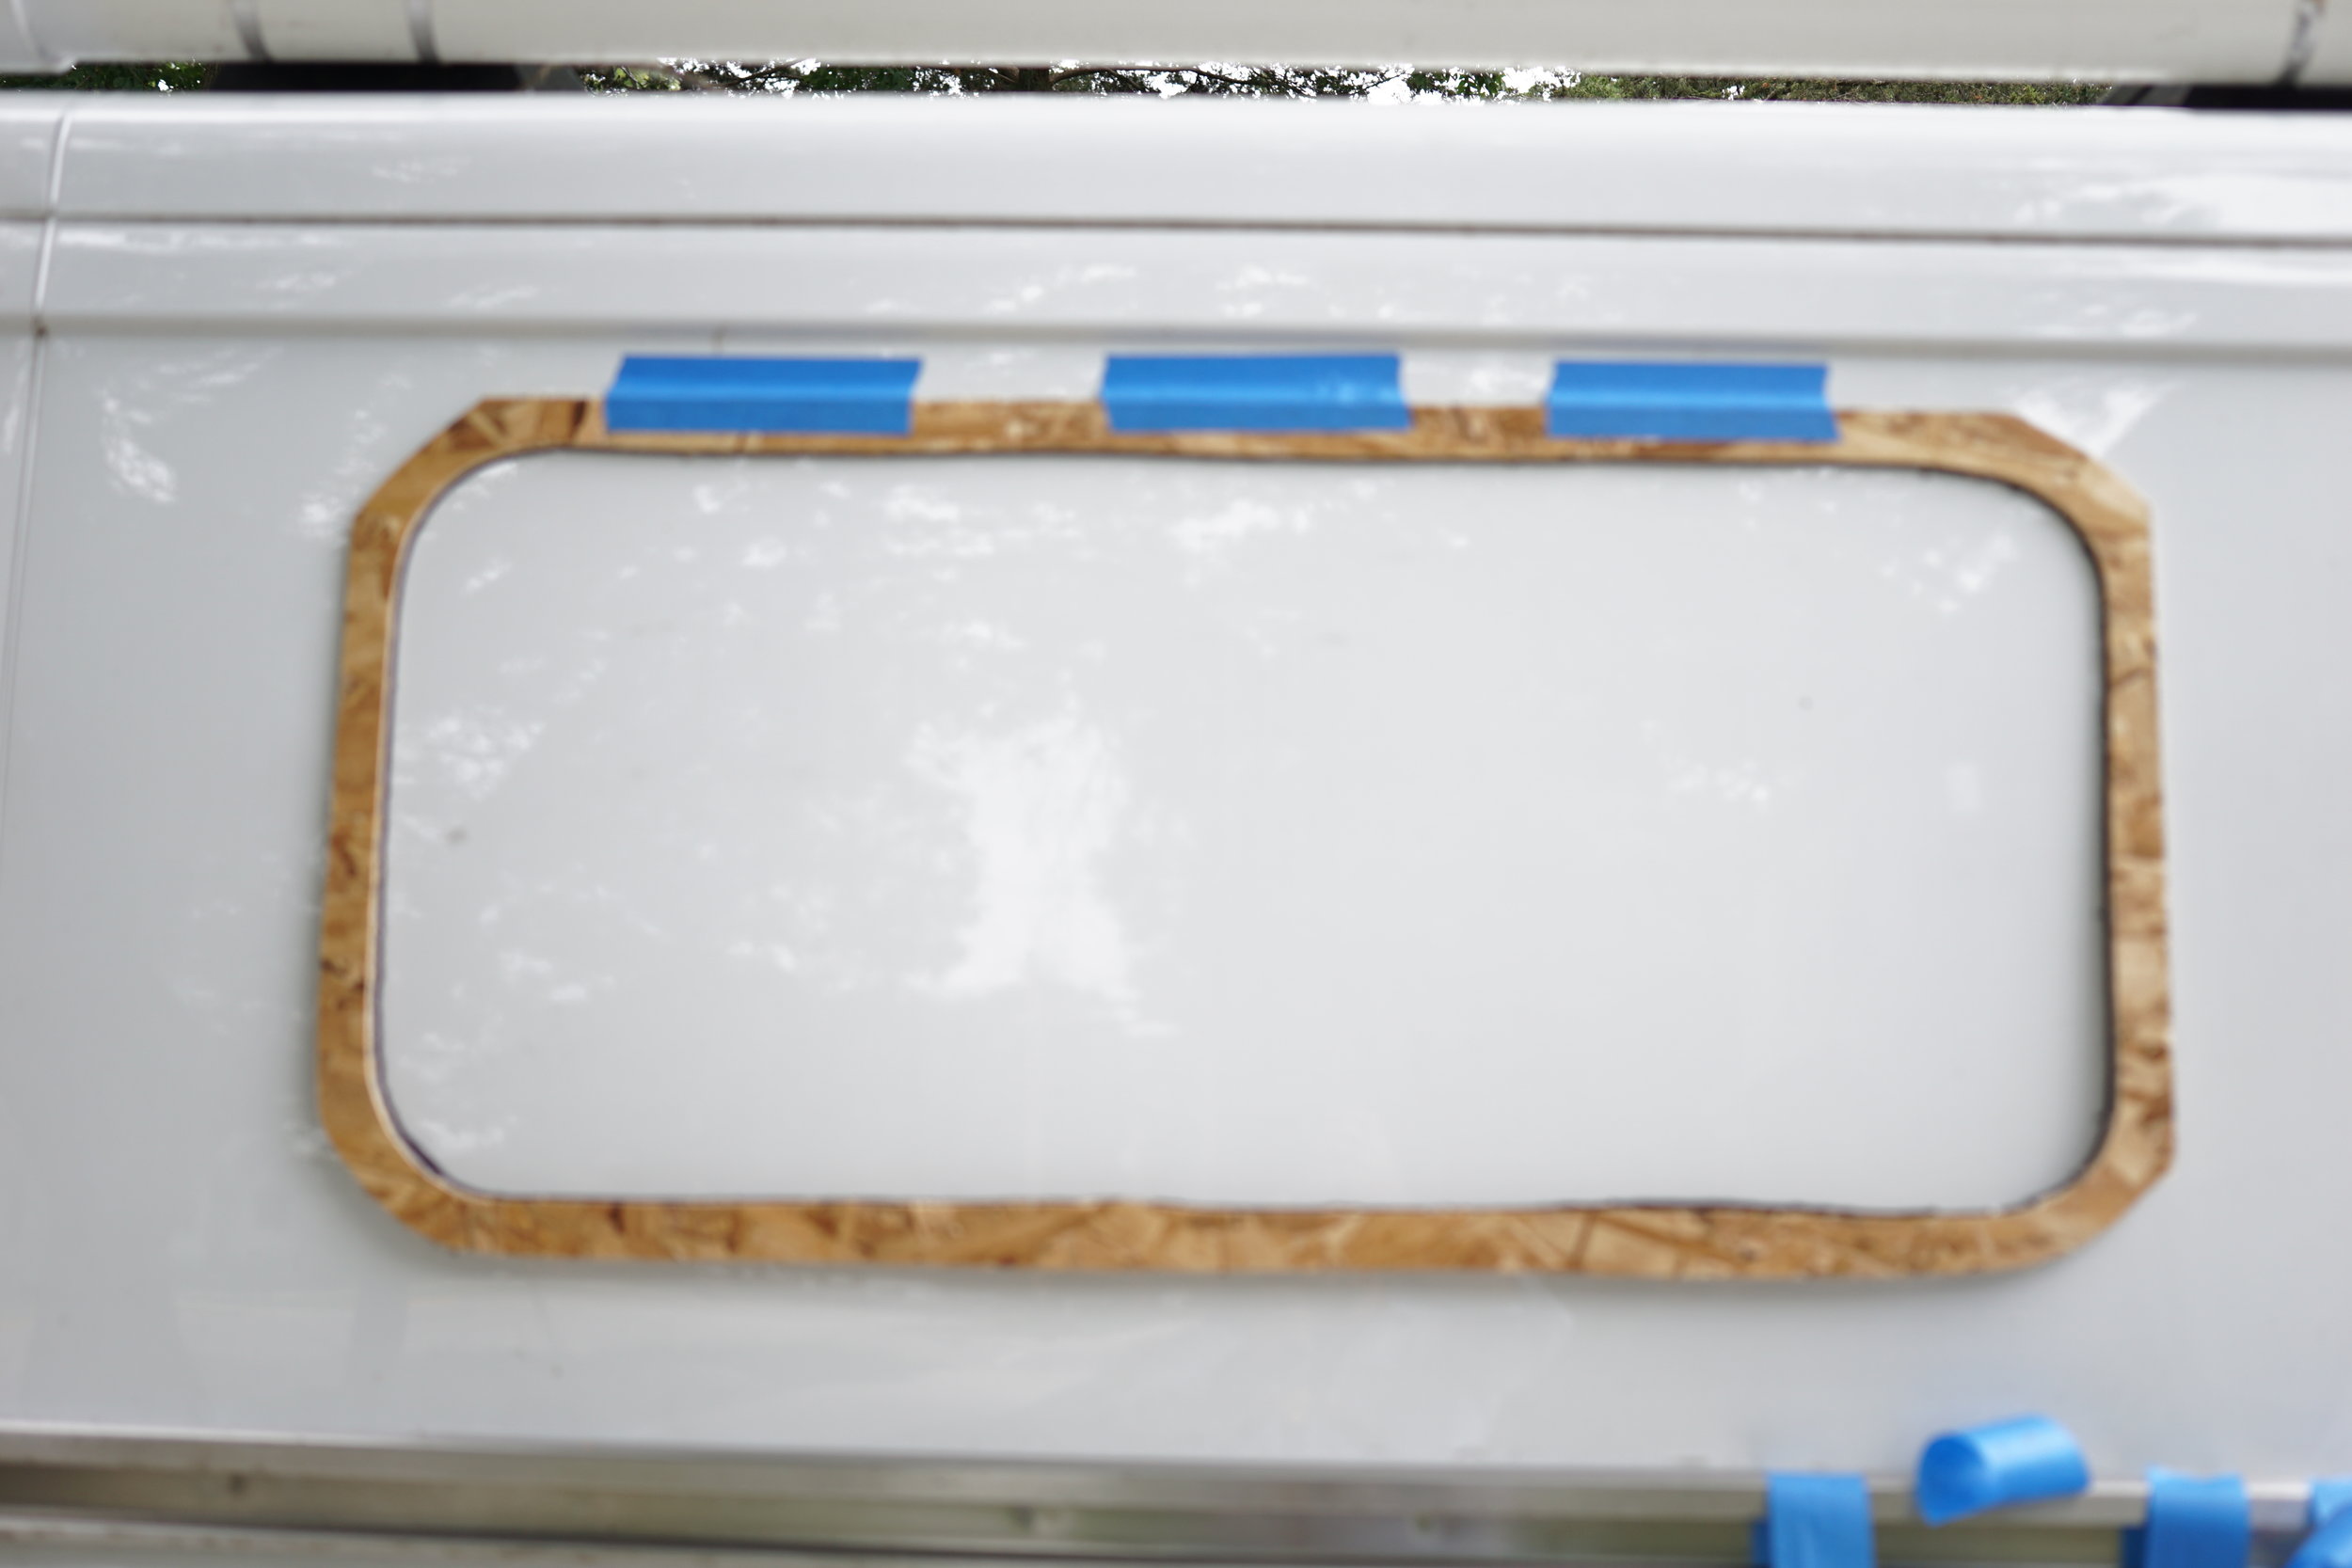
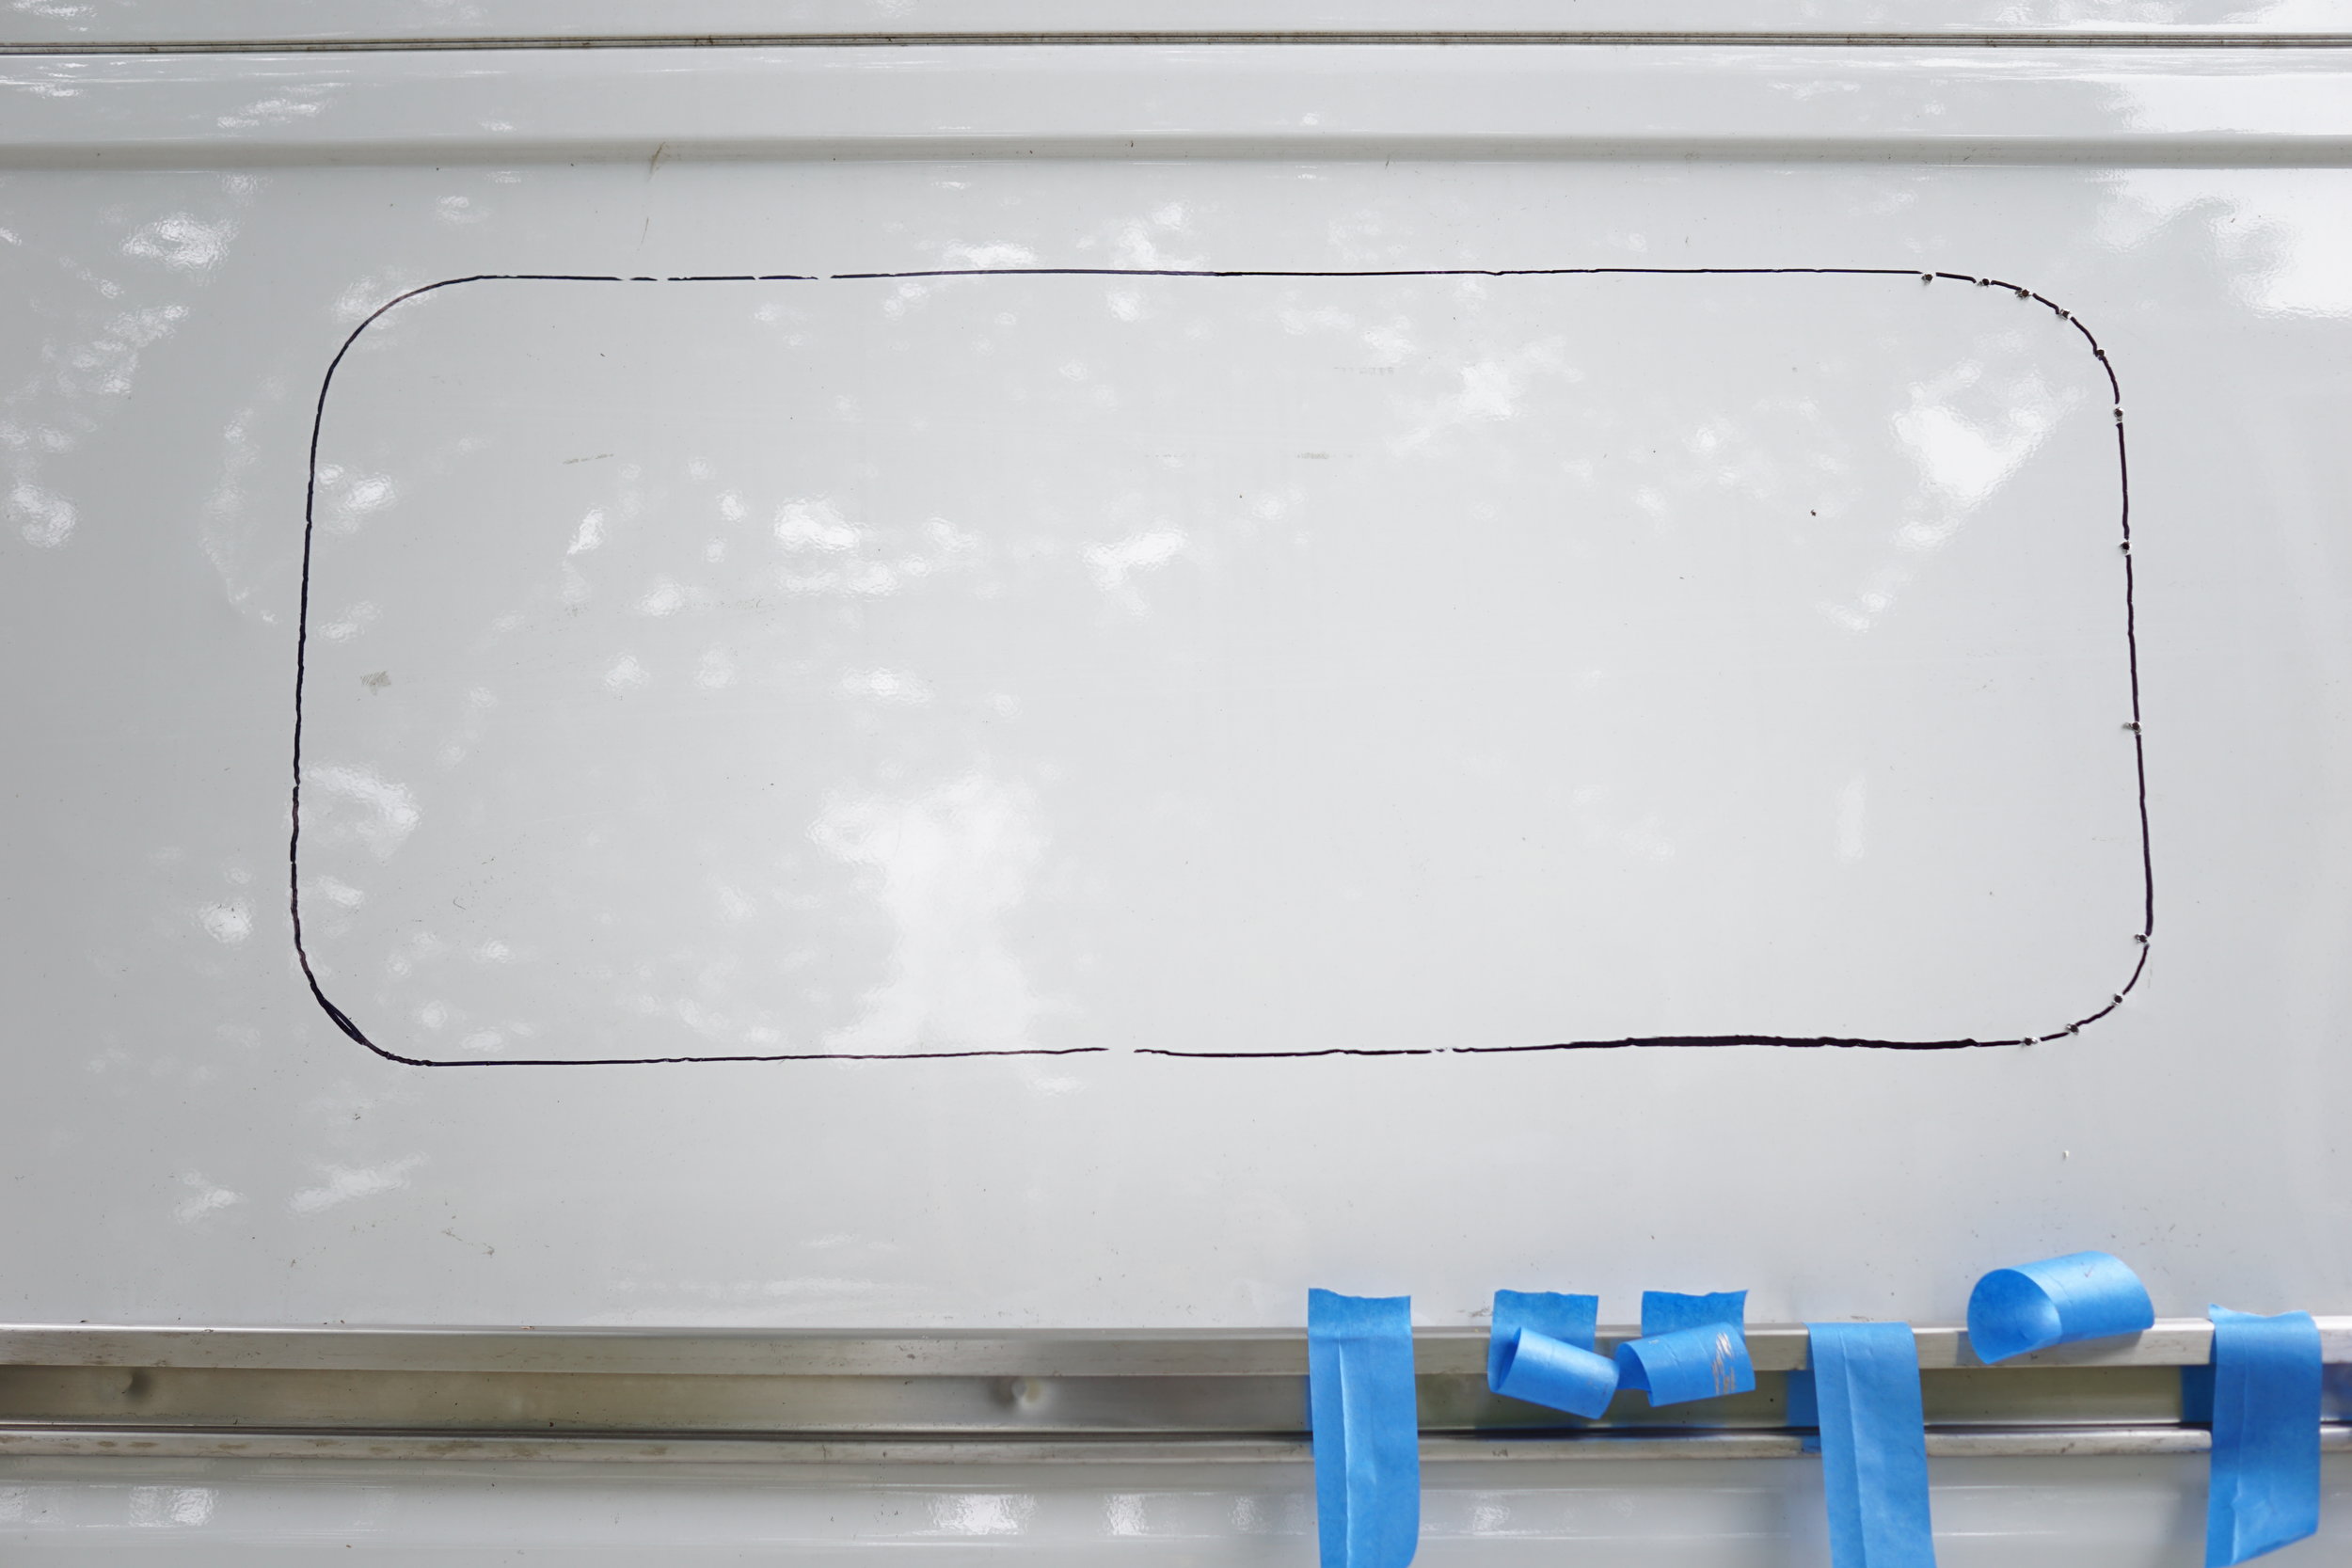
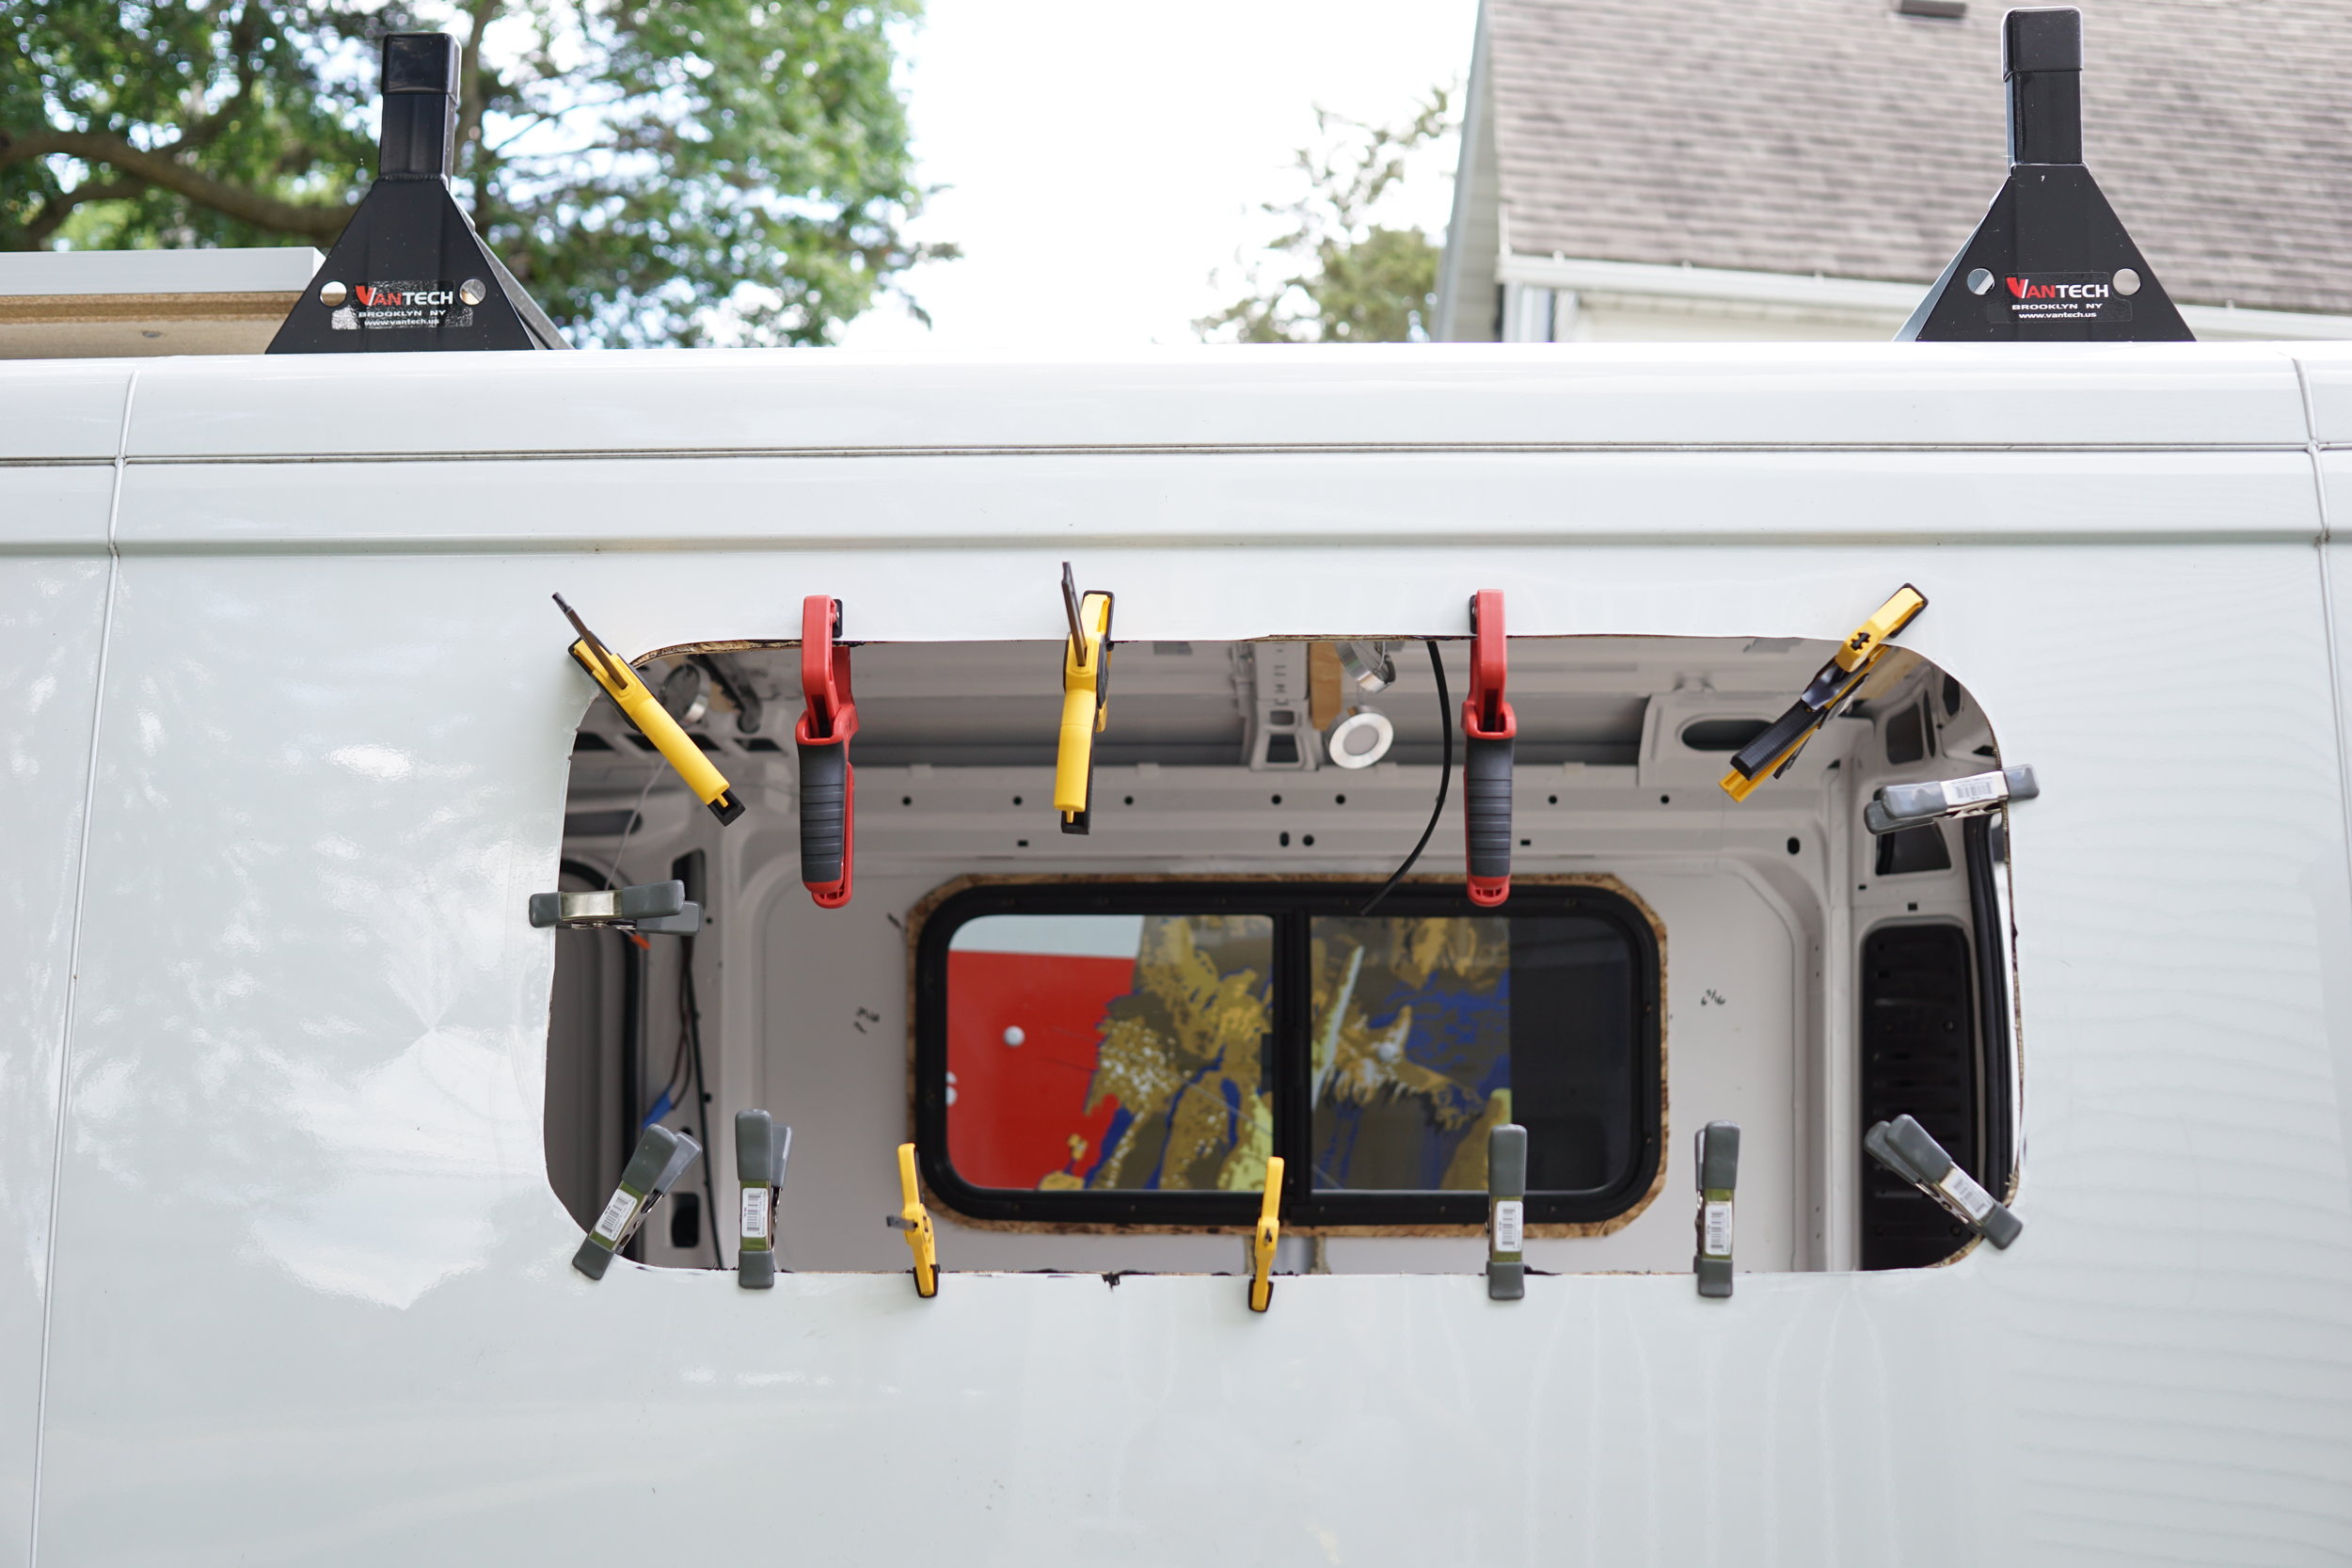
After removing the supports, I needed to trace out and cut my holes for each window. I waited for clear days with no hints of rain for this, just in case it took longer than expected. I used my spacer taped to the inside of the wall for placement and then drilled small holes around the perimeter, focusing mostly on the corners, to trace my placement to the outside of the van. Then, taking my spacer to the outside of the van I taped it to the wall using my holes for guidance and traced the interior outline of the spacer onto the exterior of the van.
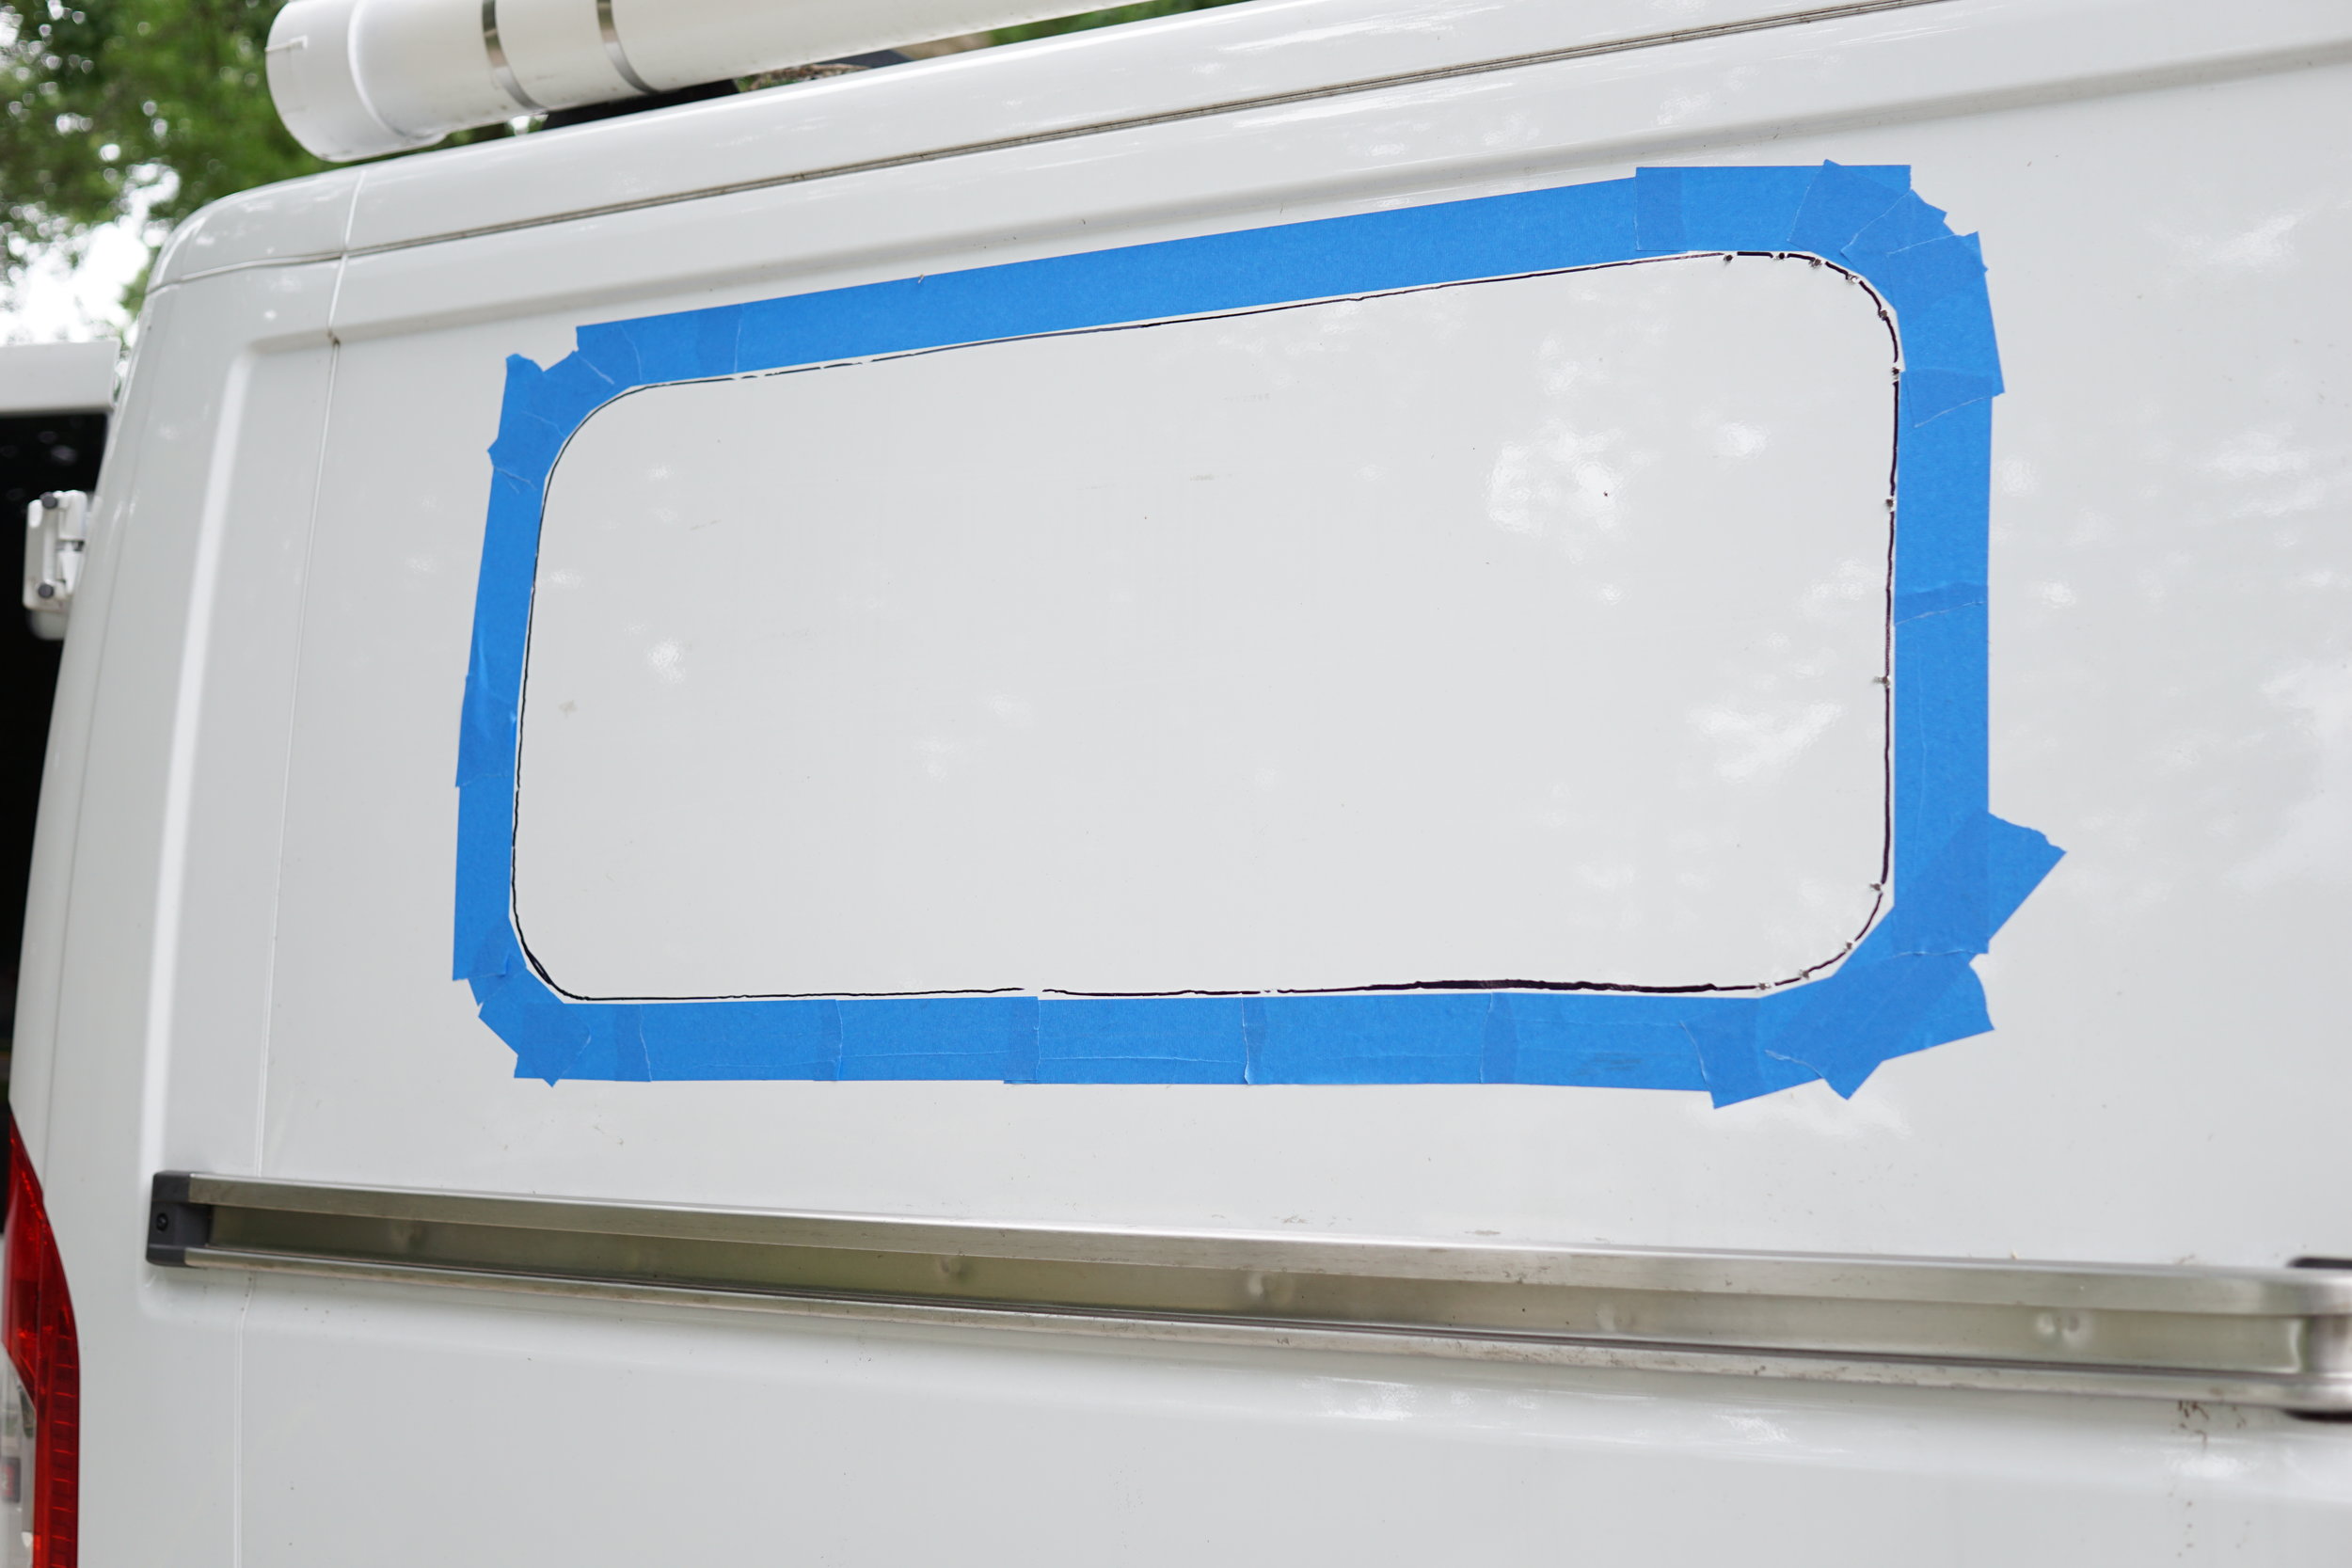
After removing the spacer, I placed painting tape around the exterior of the traced line so when I ran over it with my jigsaw it wouldn't scratch or damage the area around the window. And then it was time to cut! This took some motivation and holding of my breath… to cut a giant hole into the side of your vehicle is not exactly the most comforting feeling, but it had to be done at this point because I already had guiding holes. So I'd already reached the point of no return. I used a larger drill bit to cut pilot holes into the van and then used my jigsaw with a metal cutting blade to do the dirty work. As I cut the hole out it was essential to pause and place tape on the interior and exterior areas of already cut lines. This reduced vibrations and movement in the slowly separating piece of metal. Without doing this, the metal jigsaw blade was getting caught too much and causing kickback.
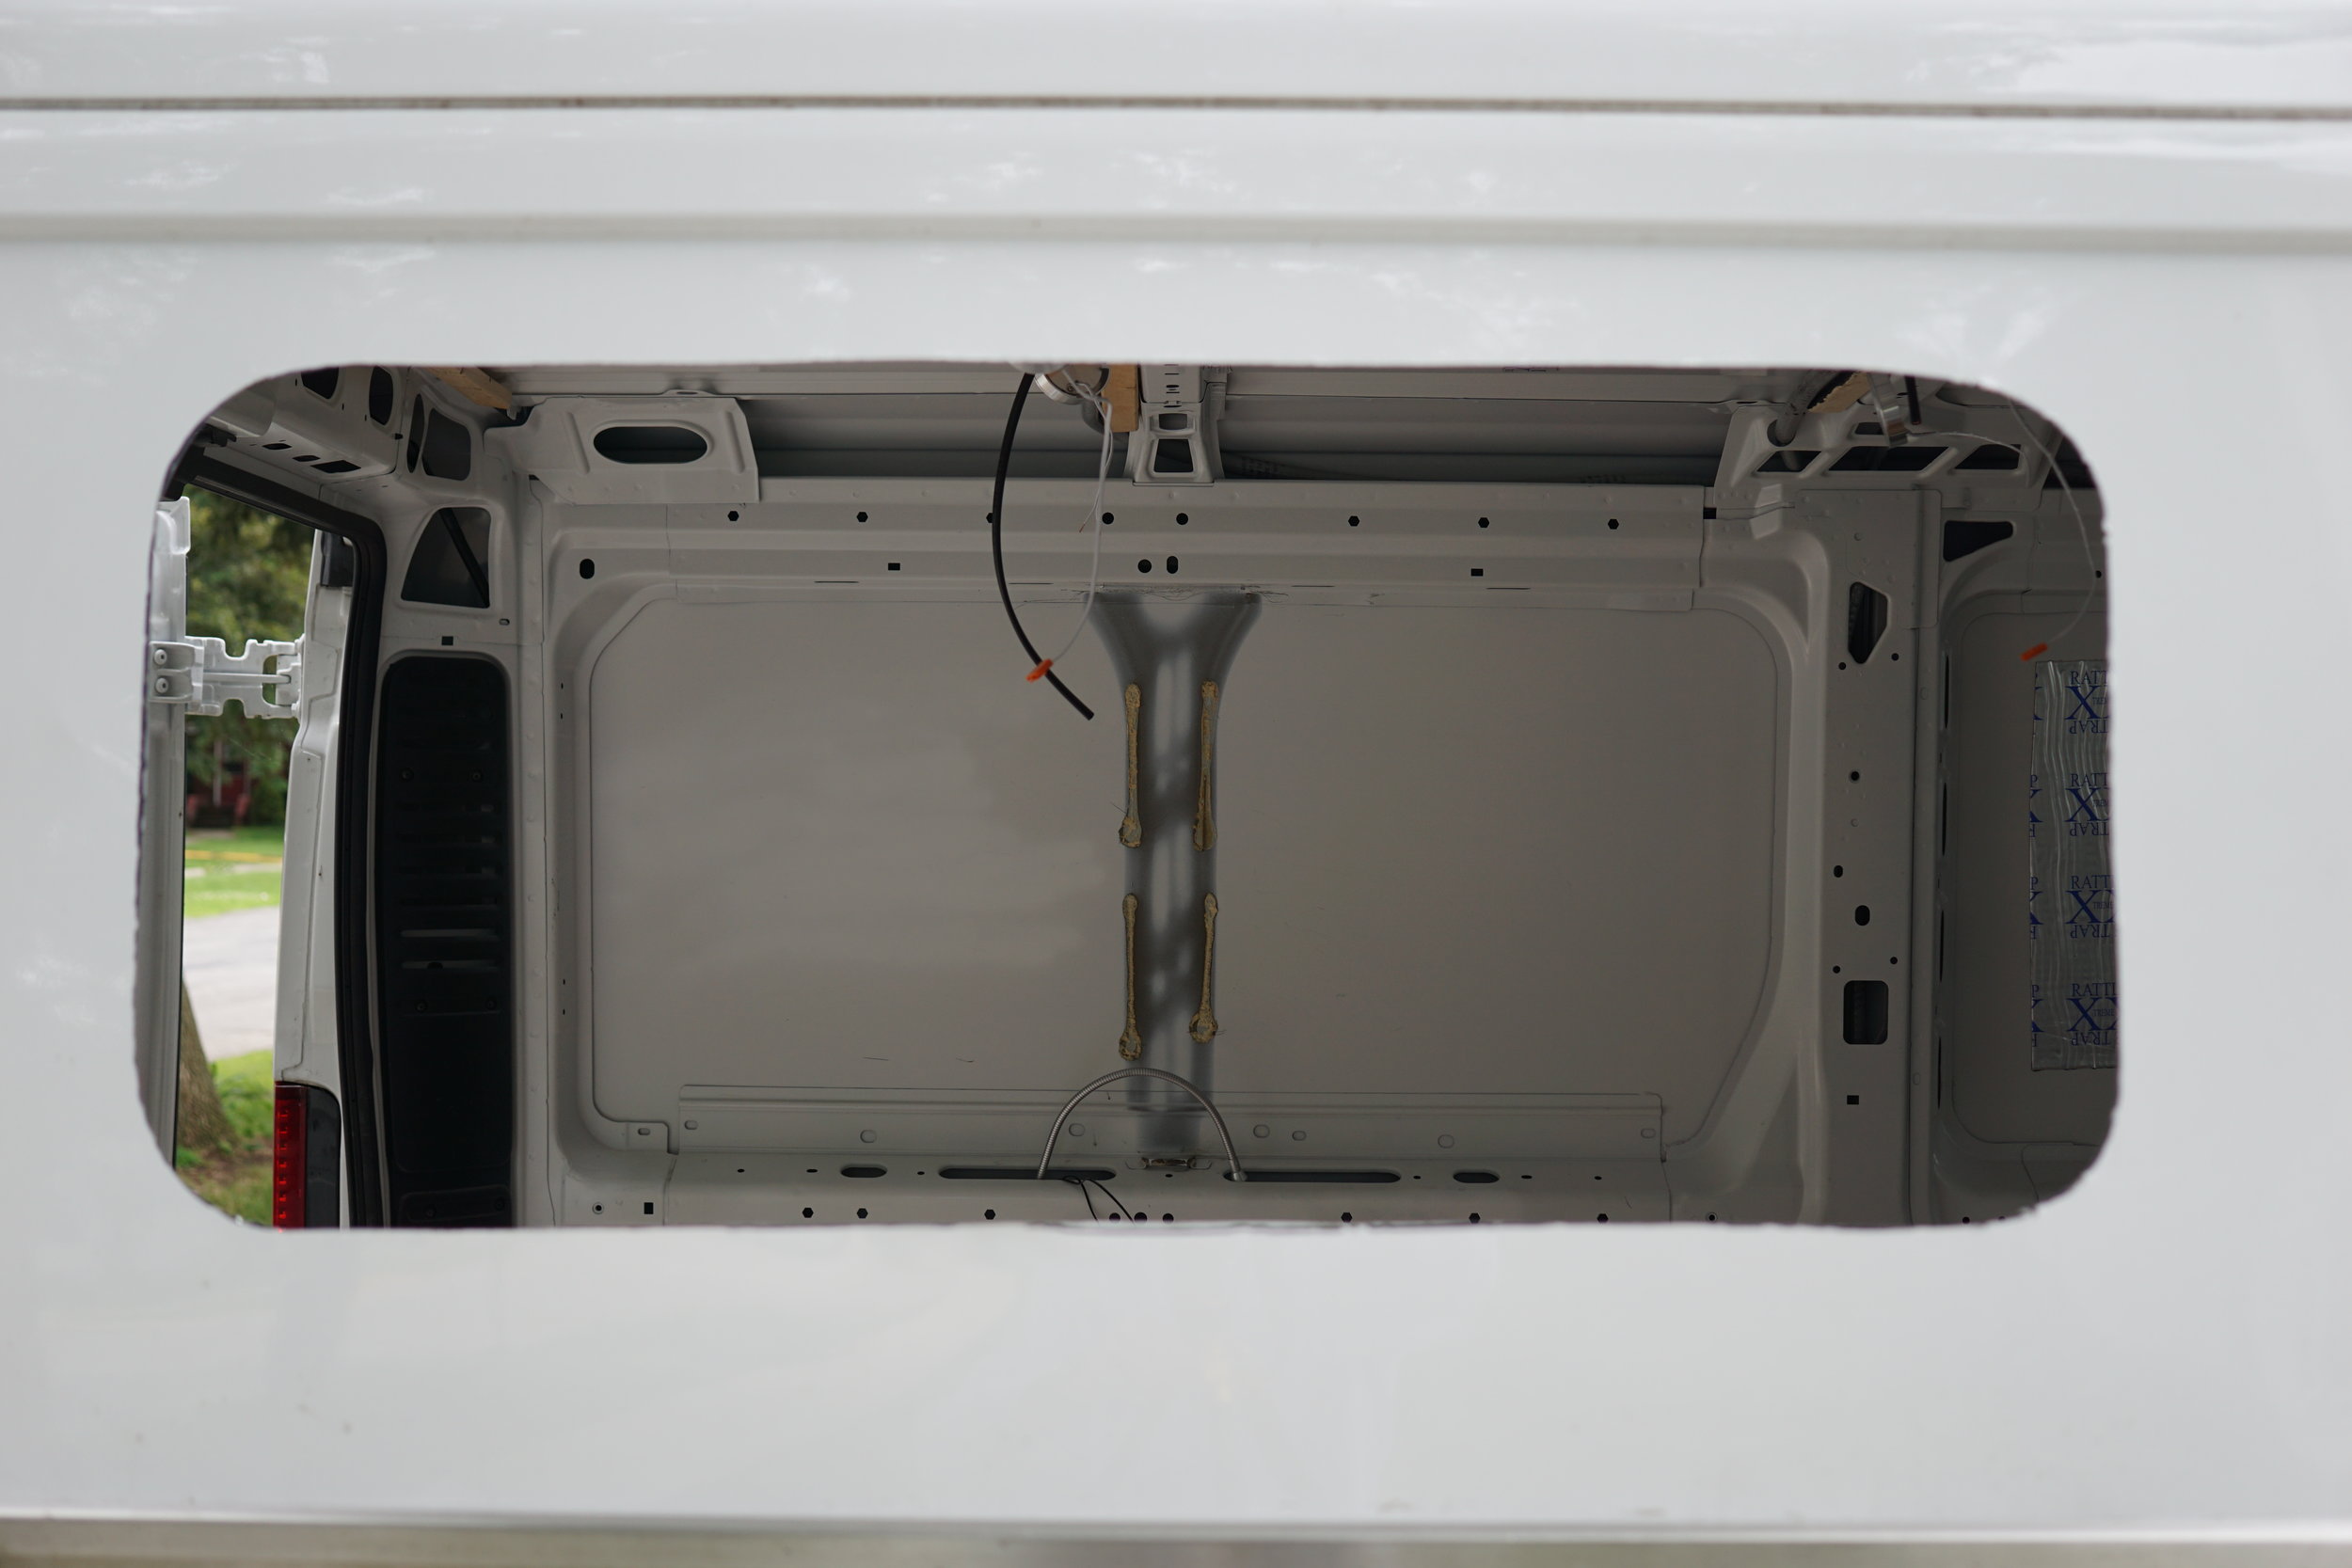
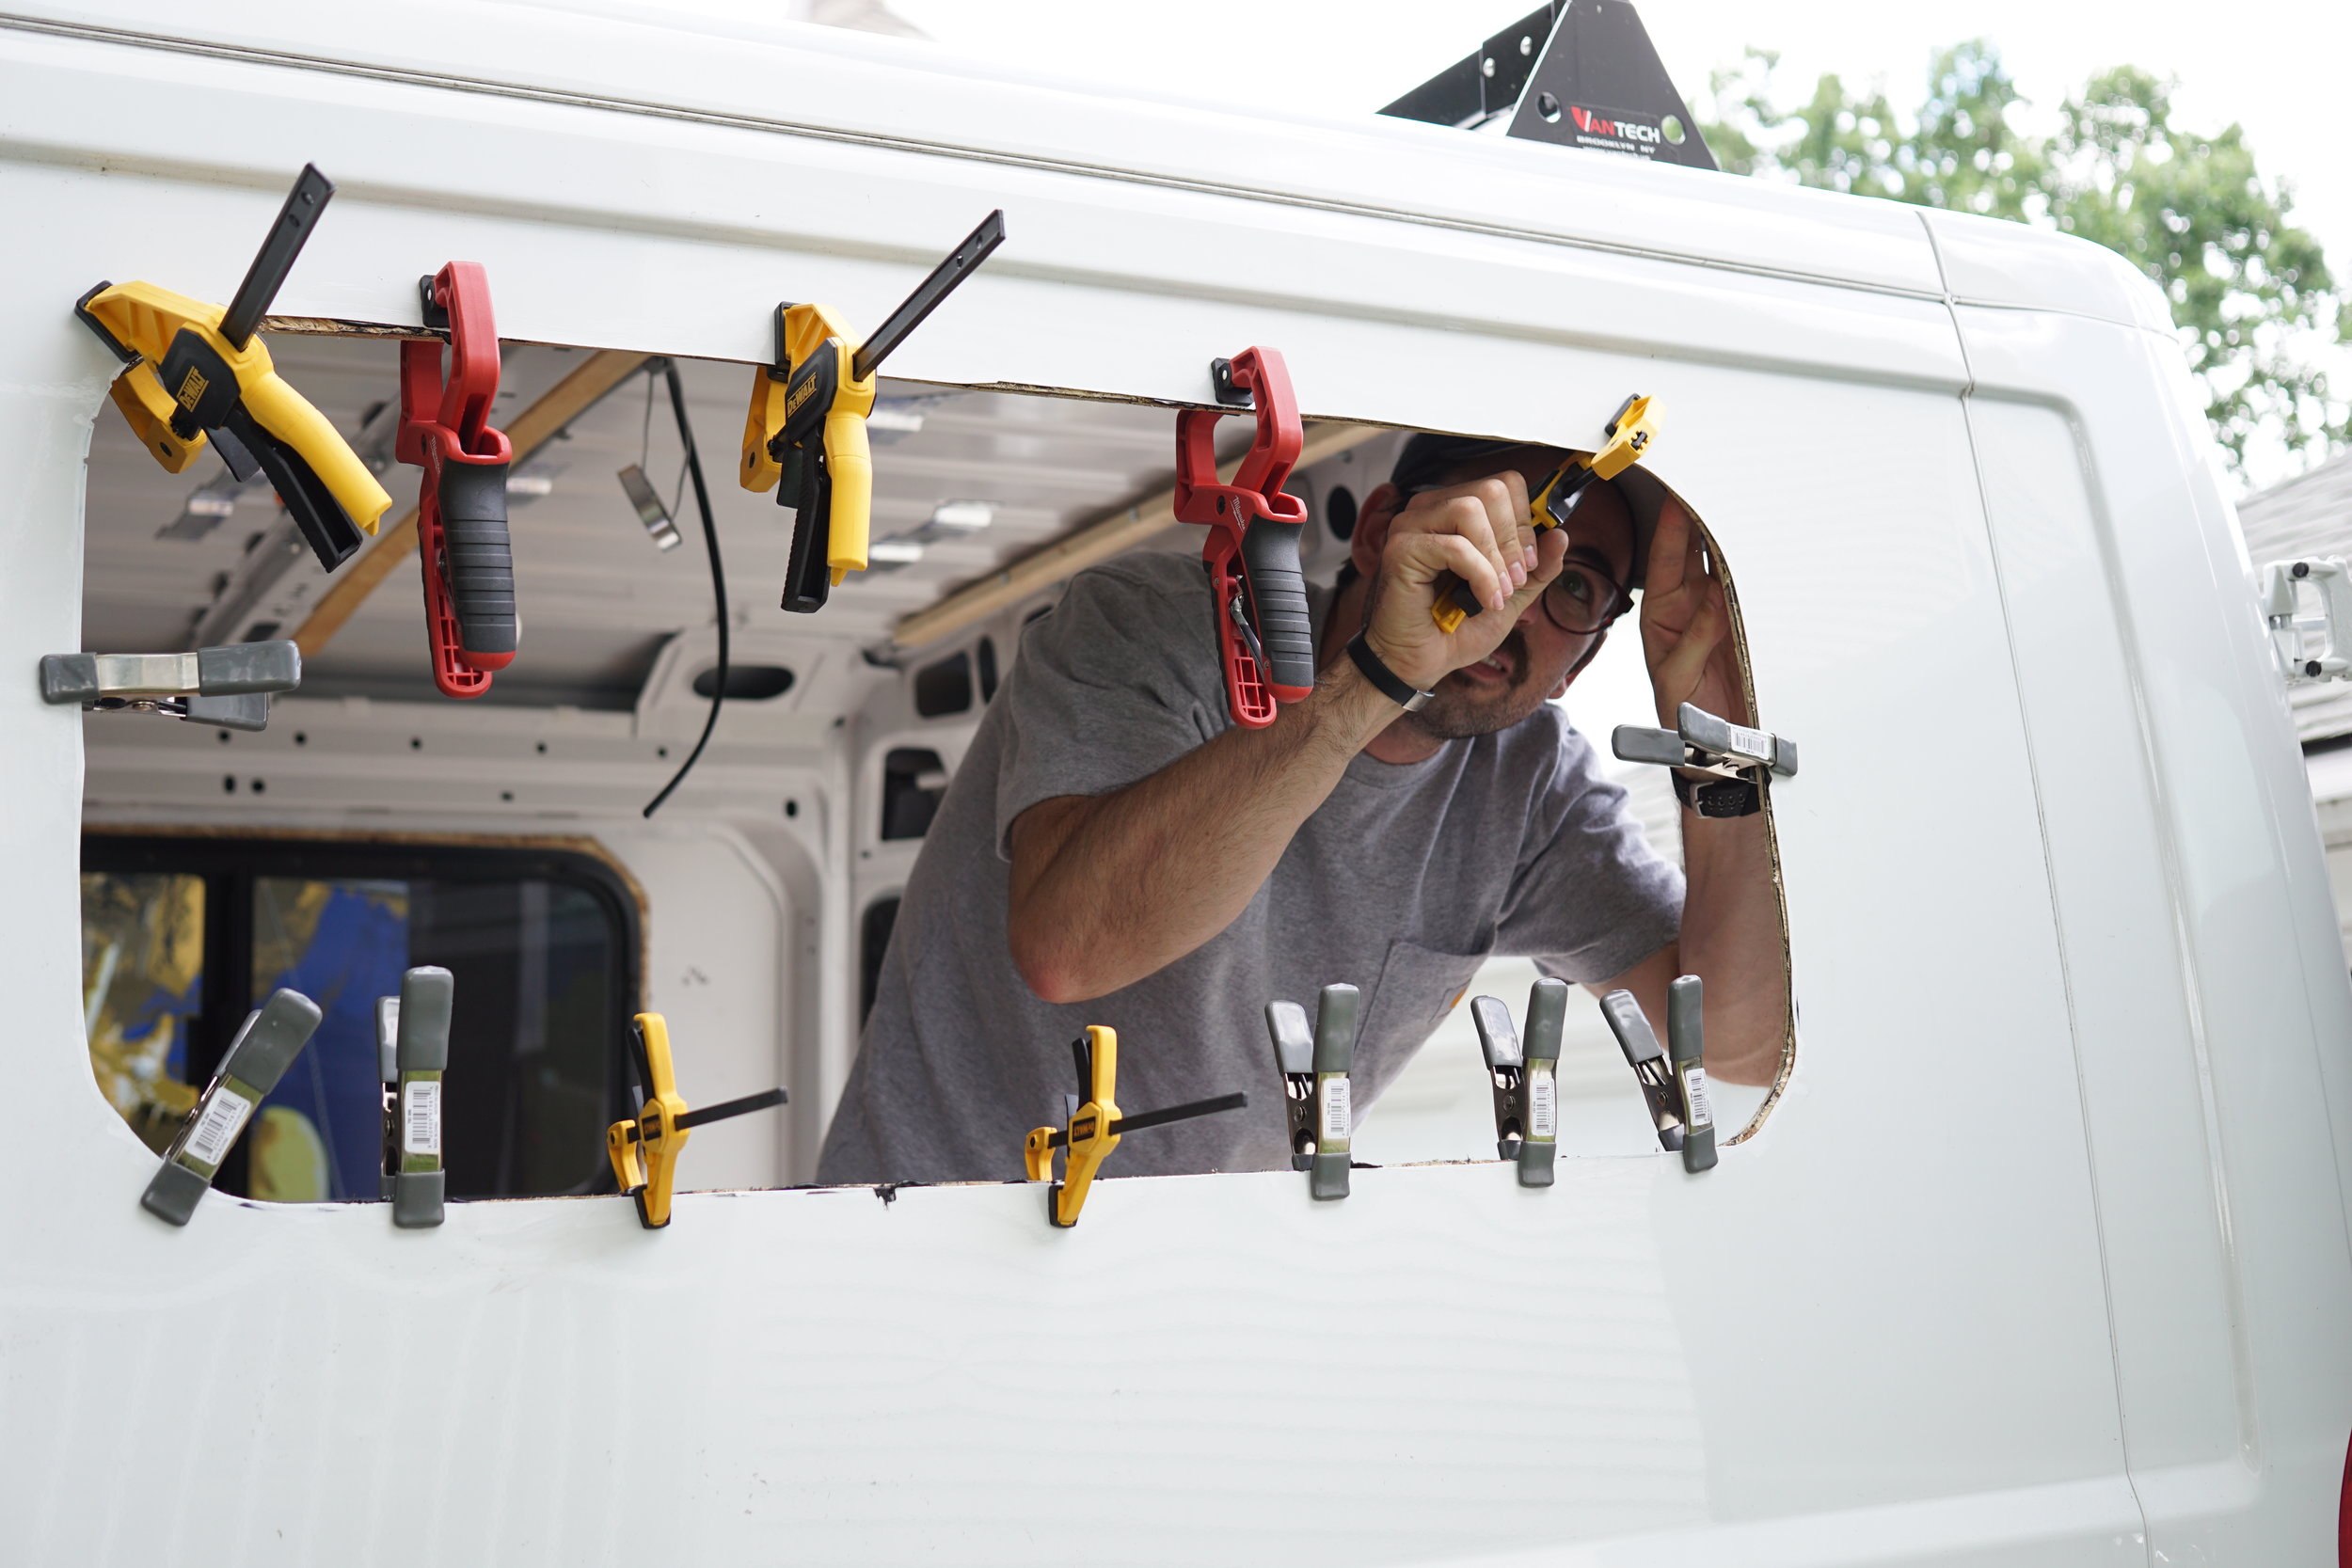
I finished off these areas by filing them down a little bit and applying rust proof paint to the exposed metal. In the end I had a nice beautiful hole and I dry fit the exterior window piece to see that it fit before installing it permanently. This was a mistake to just use the exterior piece and I did it lazily in hindsightm, causing some necesssry adjustments during the instsll. Really make sure you're using all three pieces (exterior, spacer, clamp) in your dry fit and that there's enough space. It shouldn't need to be hammered into the opening.


Window Installation and Testing
First I needed to secure the spacer to the interior of the van. Using construction adhesive around the entire perimeter of the spacer, I clamped it onto the inside wall and let it sit for the recommended timeframe on the adhesive tubing.
Once that was dry, I took the exterior window piece and applied butyl tape around the inside of the window lip. Then using my brother to hold the window in place and provide opposite pressure from the outside, I went inside the van and used my impact driver to screw the clamp ring onto the window. I realized as I did this that it was import to slowly increase the tightness of the screws. So I went around in circles, tightening each screw more and more each time. This ensured I didn't have one specific area that was too tight to allow an even clamping around the perimeter of the window. Originally I was just hand-cranking the screws with a screw driver, but my brother gave me a "duh" moment when he said I should use the impact driver to give it that extra tightness.
Excess butyl tape bled from behind the window lip after tightening the clamp, so I used my scraper to remove the extra. I also read that this would continue to leak out over the next day, so a few times, after several hours, I had to remove more butyl tape with the scraper and also continue to tighten the screws a little bit as it became more settled.
Lastly, I went around the perimeter of the windows with a waterproof marine sealant once the butyl tape was fully settled and I'd also installed my roof vent/fan and the cable port for my solar panel wires. I waited a while to do this because I was using a single use tube, but it was fine in the meantime.


I read that you should test for leakage by hosing the window down for several minutes, so after my first window was in place I sprayed it directly for 5 minutes. When I went to look on the inside for leakage, there was water dripping along the bottom center of the window. This had me scared, thinking it wasn't sealed. But upon further exploration I determined my method was not an accurate test of the seal. The windows I chose have a sliding window on half, which is on a felt runner. That runner can get wet and the water will drain out the exterior from drainage holes in the frame. But with 5 minutes of large amounts of water being dumped directly on the window and those holes, it flooded on the inside of the runner. So I waited for torrential rain to see if it was truly leak proof and sure enough it withstood the rain. It's rained countless times since and I've never had a problem. So if you want to test for leaks, spray it lightly for a minute with a hose at an angle that would be normal for rain.
Lessons Learned

- My first spacer was not as good as the second because my cardboard template wasn't reliable. Use a scrap piece of plywood if you have it so you can play around with the size a little more to make it just right and ensure it's an accurate representation of the medium you'll use for your true spacer (the cardboard was too flexible and tricked me into thinking it fit).
- When cutting the hole it's helpful to have a second person on hand to help tape over previously cut areas to keep it secure and even press against the areas where you're not cutting to dampen the jigsaw movement. As I mentioned, the jigsaw would kick back if the metal moved too much while cutting, so taping it in place was an essential minimum.
- The second window hole was more easily cut because I did it in sections along the major straight lines and then connected them in the end through the corners. This was easier than one continuous cut line because it kept the piece more secure.
- REALLY make sure your dry fit is accurate and test it with the entire window system, not just the exterior piece.
- You really need a second person to help hold/push the window in place to provide the opposite force as you tighten the screws through the clamp ring. I started trying to do it without my brother on the first window and that proved to not work.
- Tighten the screws slowly around the clamp ring and in even amounts to avoid over-tightening one area and creating a situation where it's not evenly secure around the perimeter. Also, use an impact driver.
- Test for leakage in a realistic manner - not by spraying the window at a 90 degree angle with a hose.

